Banner

Showing posts with label sewing. Show all posts

Saturday, 9 January 2021

2021 - Our Creative Year


One of my New Year's Resolutions is to allow more creativity back into my life. It's easy to become too "busy". I'm certainly guilty of wasting time on social media or on games on my phone.

This year I wanted to put the emphasis on my creative self. Creativity is a type of playfulness (see my other blog www.the-playful-way.com) and I think we all need a bit more of that in our lives.

It also allows you to express yourself, to find your self or your voice.

To help keep me on track and to explore a whole range of different types of creativity, I've come up with 52 different craft activities (this isn't even touching on the creativity I enjoy in the garden, in my writing or in my teaching or tutoring!).

I've divided them into seasons, with the intention that I'll do four or five each month. 

For example, this month I'm hoping to
- macrame a plant pot hanger for the bathroom (1st attempt at macrame)
- make wine (I've been meaning to do this for ages!)
- make at least one cushion cover
- crochet a window valance (like this)
- make some little fabric scrap dolls.
 
What I really like about this is that my daughter has taken a copy of my list. She's ticked the ones she wants to do with me, and has added her own crafts to replace the ones that she doesn't think she can do.  We're going to get crafty together!

I've not been terribly good at maintaining the blog in 2020. I'm hoping that I'll be a lot better in 2021, and blog regularly about my crafting, writing, gardening and family exploits, so you'll be able to see how I get on with some of these crafts.

What are your crafting and creative intentions for 2021?

Saturday, 25 April 2020

Badge blankets - what are they and how do you make them?

I go by many names - but one that many young people know me by is Akela.
I've been involved in Scouts since I joined age 15 and have had all sorts of different volunteer roles.  For the last two years or so I've been a Cub Leader in Hereford.  Cub Leaders are known as Akela - like the chief wolf in the Jungle Book.
One thing that I've had that is a bit of a record of my Scouting journey is my badge blanket, sometimes called a camp or campfire blanket.  Since 1995 I have kept this blanket and gradually added to it.  I recently made a video explaining all about badge blankets.  In the video I didn't recount a funny story about how I started my blanket though:

We (the 5th Exmouth Venture Scouts) were going on a white water kayaking trip to the French Alps.  I had already cut my poncho shape and started my blanket stitching around the edge before heading off on the minibus.  By the time we got to the ferry at Portsmouth I had started stitching my lettering and walked up to the passenger area proudly sporting a blanket that said "Mel's Big"... hmmm.....  I continued sewing on the ferry but the result as I walked back down to the bus wasn't much improvement... "Mel's Big Blank"  I absolutely didn't care - I guess I have always been somewhat... individual.

Wednesday, 8 April 2020

Creative makes - a child's art case


I thought I'd share my latest make.  It was my littlest nephew's 5th birthday yesterday.  I had already bought him a couple of bits but wanted to make him a little something too.  I don't see him all that often (and when I do he rarely speaks to me), so I asked my sister what he's into at the moment.  The answer came back: Star Wars and the Avengers, games and puzzles, and books.

The first thing I did was search for some Avenger fabric.
Once that arrived, I decided what to make, found some plain fabric to pair with the Avengers, and made myself a pattern.

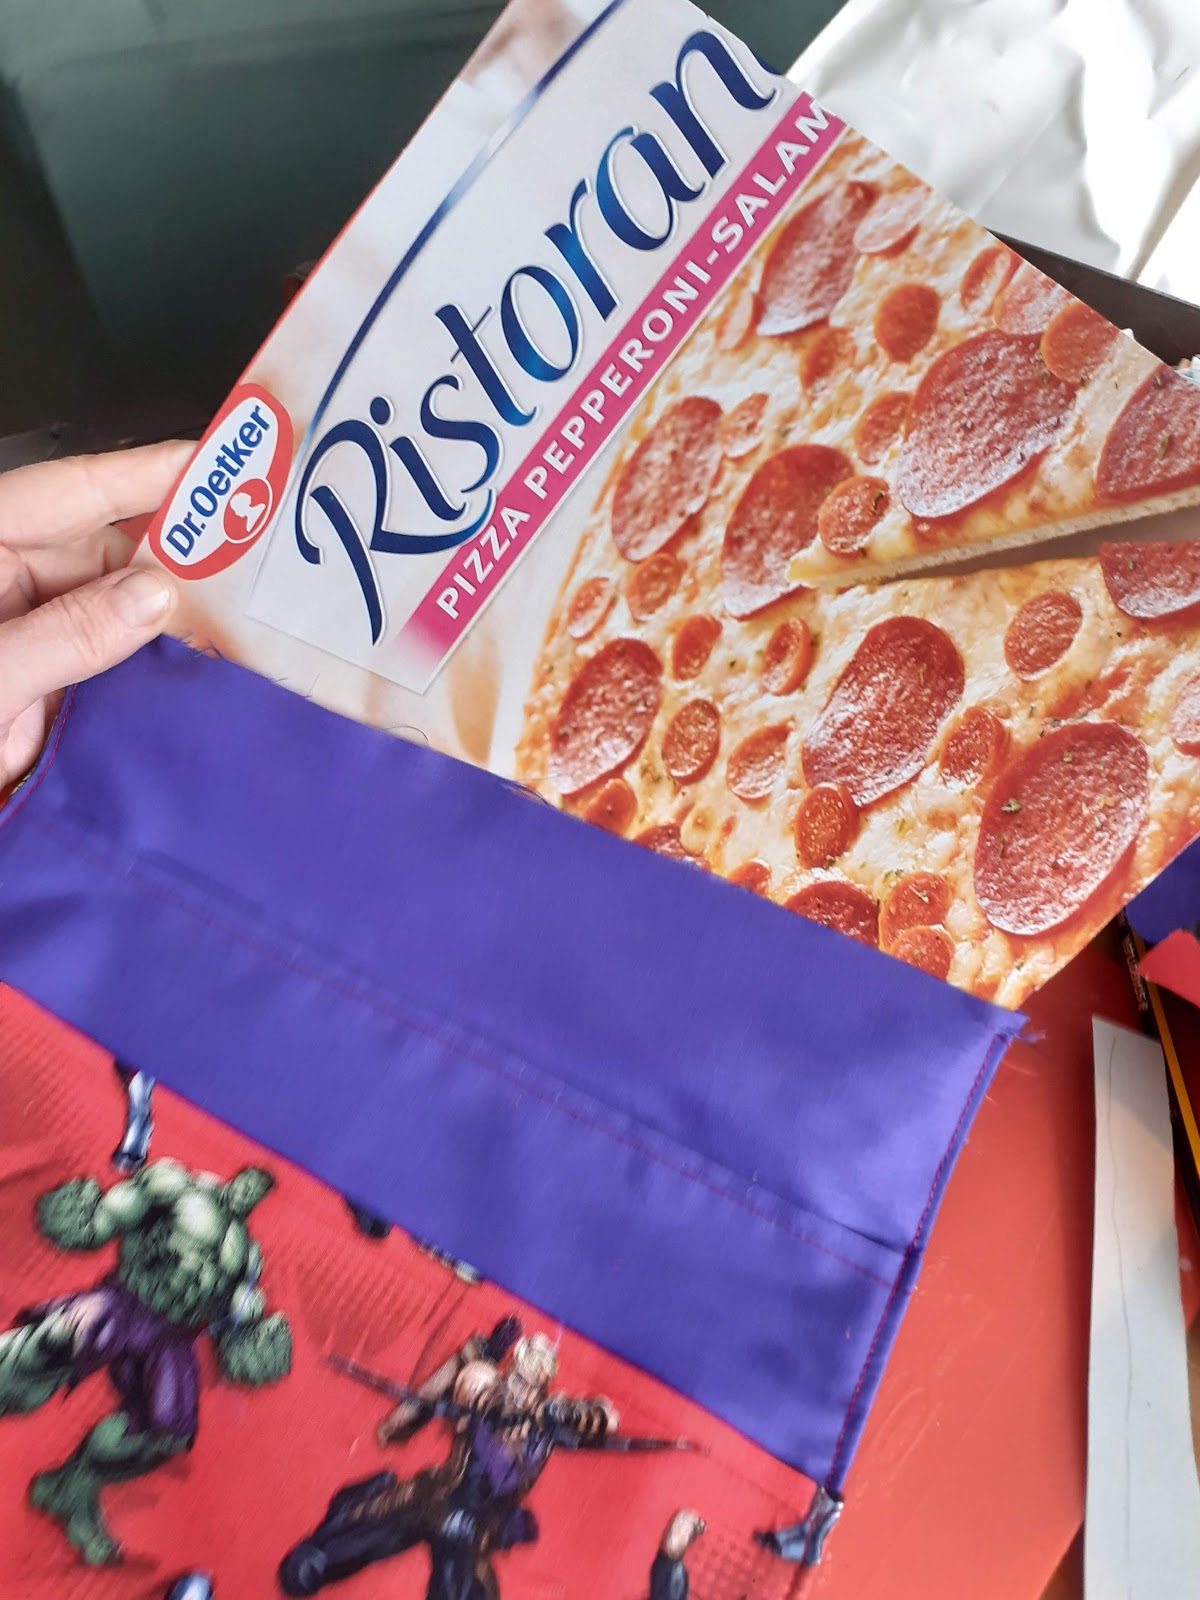
Then I got stitching.  I did it in two halves so that when carried, the Avengers stay the right way up on both sides.  First I hemmed the pockets, then stitched them onto the plain fabric.  Next, I sewed the edges of both fabrics together on three sides, inside out.  I then turned them the correct way and top-stitched.

The next step was to cut some cardboard to size for the inside.  This is to make the case firm, so he can lean on it when out and about.  I used a pizza box from the recycling.


Finally, I made a handle and then stitched it in place as I sewed the two halves together.  This was the trickiest part as there wasn't much leeway on the fabric around the cardboard and I also wanted to do it neatly, without leaving any raw edges.  I then slotted in some paper, pencils and the notepad I had already bought, made a birthday card to go with it and popped it in a parcel ready to post.

P.S.  Sadly, I don't think popping a parcel to the post-office counts as an "essential journey" so I haven't yet dispatched the children to the post office for me.  The parcel is still sitting on my desk and waiting for the Covid storm to break before it goes in the mail.  On the positive side, this means that littlest nephew will get an extended birthday as the gifts will be rolling in at some point through the Spring and Summer! 


Tuesday, 1 August 2017

Cross-back apron crafty project

Check out this beautiful cross-back apron that my Bug made.
 The pattern and a tutorial can be found here
 She chose the fabric herself and used my sewing machine.
It looks so gorgeous on her and check out how proud she is of herself.  I love it so much that we've chosen fabric for each of my two nieces and I'm making one each for their birthdays.

Thursday, 2 June 2016

Crafty mum - embroidered shorts

I don't know where I got this idea from, but since I have a daughter who likes to combine her love of all things girlie with a propensity to wallow in mud and climb trees, we have to have clothes that will stand up to a certain amount of rough treatment.
 I took a pair of her brother's outgrown shorts and decided to prettify them.
It's taken me over a year, as they've languished at the bottom of my sewing basket and been occasionally worked on in between other projects, and I was dreading her trying them on in case after all that effort they no longer fit her.  
Here they are... some proper tough shorts for adventures, with pretty butterflies and flowers embroidered all over them.  I've now been commissioned by son to sew some bits and pieces on to his clothes too.
I know that you can buy clothes, both pretty and tough, for next to nothing at Primark or the supermarket, so it really doesn't matter if they get torn halfway up a tree, but I like to do things differently, and if that means spending hours embroidering shorts that will only be worn for a few months, then that's what I'll do! ... in any case, I have plans to cut out the embroidered bits and incorporate them into a cushion once they're outgrown, so it won't be thrown out.

What crafty projects have you been working on lately?  Fancy some embroidery?

Tuesday, 19 May 2015

Tuesday Tutorial - How to make a campfire cushion

 Some of you  may remember my post a few weeks ago about the tepee I made for the children to play in the garden.  I also made a campfire cushion and some bunting to go with it.  From Bug's point of view, the tepee is certainly the most successful item, and she also loves the bunting, and has plans for me to make a lot more of it.  For me though, I was most pleased with the cushion.  I've now made several more of these campfire cushions, am sending one to a friend from Scouting (I sent me something awesome several months ago, so if he reads this he'll now know who he is), and have some for sale on my Folksy shop, with a posting coming soon on Etsy.  So here's how to make one:

You will need: 
  • canvas or other fairly hardwearing light coloured fabric.  I used lightweight canvas because I had plenty left over from the tepee construction.
  • a square each of red, orange, yellow and brown felt
  • fusible interfacing (bondaweb or similar)
  • red thread and natural thread
  • polyester toy stuffing - large bag
  • cutting tool (I use a rotary cutter and mat), scissors, sewing machine, needle

 - First measure and cut your first triangle.  Each side is 40cm (about 16 inches).
 - Cut around this triangle to cut three more.

 You can either cut your felt into flames and log shapes first and then fix them to the fusible interfacing (as I've done in this picture) or you can fuse the interfacing onto the whole sheet of felt and then cut out the shapes (which I did when I was making eight cushions at once).  Either way, you get your flame and log shapes with the fusible interfacing on the back.
 Peel the backing paper off the interfacing and arrange the flames and logs how you'd like them to make your fire, then iron them through a damp cloth to stick them.
 Use the sewing machine and red thread to stitch over the edges of all your felt pieces.  This not only stops them from peeling off in the future, but also adds some definition to the fire.
 Next, pin the triangles together right sides together (making sure to keep all the fires the same way up) to make a pyramid and stitch with cream or natural coloured thread, leaving a small gap on one of the bottom edges to turn the right way out.
 Turn the pyramid the right way out, stuff and then overstitch to close the gap.  
Et voila!  A cosy campfire cushion to inspire creative play and just to look gorgeous around the home or garden.

Monday, 23 March 2015

Chocolate corn flake nests and a couple of cloaks - Monday's make

Today I've made two more reversible play capes from "Growing Up Sew Liberated" by Meg McElwee.  I had a special request for this colour combination on my Etsy shop (link on right), and always make two things rather than one (economies of scale!), so I've already dispatched my commissioned order, and have a spare in stock.


I also made a dozen of these cornflake confections with the children just now:


I wanted to include some information on my decoupage experiments, but since they aren't finished yet, I'll post on those at a later date, and you can just get a sneak preview:


What have you been making this week?

Monday, 16 March 2015

Pencil cases - Monday Make

This week I've made nine pencil cases.  Eight are to sell through Sunbow Designs - either Etsy or Folksy (see links on the right) or directly.  The ninth isn't in this picture, I personalised the embroidery and made it as a birthday present for Bug's friend.

They are all lined, and I decided to make half of them with the patterned fabric on the outside and plain turquoise lining, and the other half with the turquoise on the outside, embellished with applique and embroidery, and the patterned fabric to line.

This fabric comes with blue, pink and cream backgrounds.  I've made reusable washable snack-packs and sandwich wraps with the bird-love blue background, and I've sold all of them.  I was looking for some butterfly fabric for these pencil cases, but couldn't find any on this visit to my favourite fabric shop, so decided to go with a fabric that has proven popular on my Etsy and Folksy shop so far.  Maybe I'll even get some repeat custom from people who've already bought a sandwich wrap?
The making process for these is pretty straightforward once you've done it a few times, and especially if you're making several at once.  Next time I make pencil cases I'll remember to take step-by-step photographs and will include a tutorial.

What have you been making this week?

Monday, 9 March 2015

Handmade felt baby mobile - Monday Make

I thought that each Monday I'd share something I've made recently - Monday Make.
Sometimes I'll have made it for my home, sometimes to sell at Sunbow Designs, sometimes for a gift, and sometimes it'll be something that the children have made.  Sometimes I'll do a tutorial, and other times I'll just post a picture and a brief description.

I'm going to start off with this handmade felt baby mobile.

A friend recently adopted a baby, and to congratulate the new family, the toddler group in the village decided to put together a hamper for them.  I opted to source a mobile for baby's bedroom.

A quick scoot on pinterest for some ideas, a quick trip to Hobbycraft for the materials and a couple of hours sewing over half term and we have a moon and stars mobile.  I helped make some Christmas decorations for the school Christmas fair, and they were sewn with blanket stitch in gold metallic thread, which I thought looked really special, so for this mobile I used silver metallic thread... I think it adds a certain Je ne sais quoi.  It turns out I didn't attach the stars terribly well, the thread un-knotted and slipped through a couple of times, but my friend says that she's sorted it.  I love the effect, but if I was going to do it again I'd probably add another cross at the top so that there were eight strands of stars.  Or I'd hang them from a ring so that I could put as many strands of stars on as I'd like.

Now I have to get my thinking cap on for a suitable "welcome to the world" gift for my next nephew or niece, who is due at the end of March, so could make an appearance at any time now!

Friday, 27 February 2015

Making a work-space that works - my dream work-space!


As a work-at-home writer and crafter (or working towards that goal) I would love to have a dedicated work space.  At the moment we're renting a home and my things are spread throughout the house:

  • In the kitchen is where I do large scale priming and varnishing of wooden shapes, and when I'm working on these they are spread out on the floor around the edge of the room
  • In the dining room I share a computer and desk with Hubby.  My writing files are piled up on the floor in the corner.  My sewing machine lives on the floor under the dining table.  Various half-finished craft projects are moved between the floor and the dining table and back again at meal times.
  • In the sitting room I have any knitting or hand-sewing projects in progress around my chair.
  • In the bedroom I have my craft books, my knitting wool and my fabric store.
  • In the hallway I have a chest of drawers full of crafting paraphernalia, paint, paper etc. and a shelf for all my writing books.
Not ideal, but only a temporary stop-gap.  

So now I get to dream about a potential dedicated work space in our new house.  It's difficult to guess ahead, as we don't know what kind of property we're going to end up with: 3 bedrooms or 4; an attic or cellar space; a conservatory; how big or small the rooms are.  We just don't know yet.

What I would like is one dedicated space where I can keep all my things and do my work and crafting, whether that's in the spare bedroom, in the attic with the model railway, in a cubby under the stairs, or in a corner of our bedroom.  Then I can make it work for me.  
Here's what it needs: 
  • a desk or table with a computer or laptop and printer;
  • my crafting drawers;
  • a small bookcase for all my files and writing and crafting books;
  • more storage for fabric, wool, sewing machine, Sunbow stock, packaging materials;
  • a little bit of floor space;
I've been searching on Pinterest for some ideas that I love and have created this board.  Here are a few snippets to whet your appetite:
from apartmenttherapy.com 
25 Creative Workspace Ideas - Inspiration for designing a creative home office, studio or craft room. UpcycledTreasures.com
from ironandtwine.blogspot.co.uk

Friday, 9 May 2014

More creative makes - a key ring display, and dressing-up capes.

I've been busy making things again.  Nobody minds too much that the garden needs a tidy up, or that the stairs need hoovering do they?  Or that the Clackmannanshire Scout District Camp that I'm organising is only a week away and ... hmmm... I'm still short of volunteers for some of the bases?

Instead of worrying about those things, I've made a couple of things for the sprogs.

It's dressing-up week at pre-school this week.  On Tuesday it was Pirates and Princesses (and I was so pleased to see a liberated boy opting to be a princess, I thought C might have done, but in the end he decided to go Pirate).  Wednesday was Onesie day.  We don't have onesies and I wasn't prepared to buy one, so they went in their favourite pyjamas!  Yesterday was "favourite dressing up outfits", so C put on his monster dressing-gown.  And today was Superhero day.  What should we do?  We don't have superhero outfits.  Our dressing-up box consists almost entirely of accessories and bits of fabric that are completely multi-functional.  In the supermarket I looked at the superhero outfits and wasn't that impressed.  BUT... I already had on my list of things-to-do that I would make the children a play cape each, and I had the pattern.  All I had to do was make the cape by Friday, and C would be ready.  I was unwell at the beginning of the week, so never made it out to the fabric shop, but Bug and I went yesterday morning.  C told me he wanted zebra or bumblebee stripes if I could find them, but red and blue if not.  Of course, I had to make two capes.  So... here they are!
This super-simple pattern is from "Growing Up Sew Liberated" by Meg McElwee.
www.sewliberated.com
I'm so pleased with them, and they are so simple to make, that variations may well be featuring as birthday gifts for nephews and nieces over the coming months (ssshhh... don't tell).

My other make this last couple of weeks is a display unit for C's keyrings.  He has been building his collection, buying new ones with his holiday pennies, and collecting free ones when he spots them, and he loves to get them out and admire them.  I just got a piece of scrap wood from the garage, drilled a hole in each corner, sanded it, hammered a whole load of tacks in a row, painted it with primer and then gloss paint.  Hey presto!  I've tied it on to the edge of his top bunk, and he loves it!
The problem is, it's already full.  I made it just the right size.  Which means that as his keyring collection continues to grow, I'm going to need to make another one to accommodate it.

Wednesday, 2 April 2014

Tutorial - easiest ever skirt

Easiest ever elasticated summer skirt.
Probably the trickiest part of sewing this skirt is measuring and cutting out the fabric.  You are going to cut 8 identical panels.  Unless your fabric has a right way up, you'll need 1m for an above the knee skirt (length about 45cm).  Obviously a longer skirt will require more fabric.  Start with the following: Measurement A - measure around the widest part of your hips and bottom.  Add about 10-12cm (this allows for 1/2 cm seams and a little bit of leeway).  Divide by 8.  This is the measurement of the top of one panel.  Measurement B - take the width of your fabric, subtract 2 x A, subtract about 15cm and divide by 2.  This is the measurement of the bottom of the panel.


You'll probably want to draw a diagram with your measurements to make sure that it all fits.  The fabric is folded in half, and you end up with four panels on each half.  Once you have measurements A and B, you can draw a template for the panel if you like, or you can draw the whole thing on to the fabric and just cut it out.

You will end up with eight pieces of fabric this shape.
Pin them together.  
Then sew all eight seams.  I used a normal running stitch on the machine, and then did the seams again with a tricot stitch in the hope that this will prevent fraying.


Press the skirt.  While at the ironing board, fold and fold again and press to create the channel for the elastic at the top, then do another double fold and press for the bottom hem.  I then added a daisy embellishment to the bottom hem, pinned the hem in place and stitched through the daisy embellishment, and again around the top of the hem fold-over.  Next, sew around your waistband, ensuring that you've left a gap to feed the elastic.

Cut some elastic long enough to comfortably go around your waist without stretching.  Pin one end of the elastic to the skirt with a safety pin, and then attach a safety pin to the other end of the elastic and use the safety pin to guide it through the channel in the waist band.  When you've got it all the way through, tie both ends together loosely.  At this point, try the skirt on.  Adjust the knot in the elastic until the skirt fits comfortably around your waist.  Now stitch the gap you left in the waist band channel closed, and press your skirt.  You've done it!

Here's the finished item.


A lovely summery skirt (and new sandals).  Now all I need is some summer weather and a bit of sun on my legs!