Banner

Showing posts with label model railway. Show all posts

Saturday, 4 April 2020

Why it's okay NOT to do Joe Wicks

No offence meant to Joe Wicks here.  I've done a couple of his workouts and the man is a legend.  The internet is bursting at the seams with activities that you can plug into or do at home at the moment.  There is so much choice out there.  The issue is that so many of us are trying to work from home and educate from home as well as just existing.  All these activities are a good source of inspiration for parents who are used to out-sourcing their children - gym classes, Cubs, swimming lessons, boxing and so on.  However, it does leave you with a vague sense that if you aren't doing Joe Wicks every morning, followed by online art lessons, online Steve Backshall, online Scout activities and online education, as well as downloading all the free resources being offered by the BBC, Twinkl and every other portal on the interweb, then you are somehow failing your children.

I'm here to tell you that this is not so.  

What is important is maintaining sanity and love within your family.  

In a time full of financial and health anxiety, in a time when people are concerned about their jobs and their family and friends, in a time when we are facing an unprecedented global pandemic, that's when we are all confined to our homes and cut off from friends and from the outdoors.  A walk alone in the woods is my choice of activity to re-balance and to restore my sense of self and optimism.  We normally have a healthy mix of society and solitude in our lives.  Time to think and time to talk.  At the moment we have some people forced into solitude, while others are denied it.  It's hard for our children too: used to the routine and society of school, time and space to run and jump, laugh hysterically at the daftest things, feel proud of themselves when they get the right answer or seek solace with friends if they don't.  Now they're stuck at home with only a limited understanding of why. 

I'll be honest.  I'm finding this hard.  I'm supposed to be self-isolated for another ten weeks.  I want to do a good job for the families I'm supporting as a teacher and as a Scout volunteer; I want to get the house and garden looking good; I want to build up my writing again; I want to get fit... all during this period of isolation.  What I'm learning though, is that looking after myself and my family is going to have to take priority here.  In the last few days I've had a deep sense of anxiety, unease and disquiet.  I have been irritable and tearful.  Miss Busy, who is very nine: noisy, messy and emotional, is finding the lock-down overwhelming and needing her mummy.  My husband, when he gets home from a busy and tense day as a hospital doctor, needs a lot of support too - for him, planning for the future helps him deal with the present.  

So I'm remembering that I need to prioritise cuddling with a film over replying to e-mails;  Playing a board game with the children over cleaning the floor;  While my to-do list doesn't get any shorter, reaffirming connections within the family, building our strength in this time of uncertainty, seems the more important task.  When this is over, like the flowers that grow back more vigorously after they've been cut back, we will be ready to bloom vibrantly.  When we look back, we'll think of 2020 as the year that made us.

So don't feel that you have to be busy all the time.  Don't feel that you need to keep up with all the activities and resources.  Don't worry about fancy-schmancy specially-created internet resources and lessons.

Do your best to keep up with the things that you have to do for your work and your children's education (don't worry too much about this - they are remarkable at learning when nobody is teaching them, and will also soon fill in the gaps when they get back to school).  Mostly though, it's okay to do the simple things, to spend time just being, and just connecting with your children.

Here are a few things you can do as a family: 

1) play with the kids - get the Lego or the doll house out and get down there and play with the children.
2) Do the housework together.  This one may be a harder sell for older kids, but I taught Mr Build-it to iron shirts yesterday (we had to submit a video for his Scout Skills Challenge), you're teaching them valuable life skills, and its definitely more fun when you do it together - and that's a life-lesson in itself.
3) Play silly games like charades and hide-and-seek.  A daft friend posted a video of herself playing noughts-and-crosses with her dog.  (ask and I'll tell you how - very amusing!)
5) Rediscover peaceful crafts that you can just sit and do together - drawing, painting, rock painting, crochet, knitting and sewing.  Or if those don't appeal - how about wood-work or creating miniature models for Warhammer or a model railway.  These things take time and lets face it, we're not going anywhere in a hurry, and you get the satisfaction of creating something.
6) Bake and cook together.  Explore those cook books and come up with some recipes that you can make.  (Forward planning is useful here as given the shopping limitations for most of us at the moment.)

Most of all, try to relax.  Don't try to do too much.  Press the "Reset System" button on your life.

Sunday, 10 August 2014

A bit of reverse progress on the model railway

I've posted several times over the last year or so about the progress (slow though it may be!) on the model railway. (here, here, here and here)

You'll notice that we are now selling the house and moving to a rented house for a while before we choose another property, so inevitably progress on the railway has halted.  In fact, the railway was dismantled at an early stage in the marketing of our property, so that the large room upstairs looks a bit more... roomy.
Most parts of the model were carefully taken to bits and packed away ready to be rebuilt to fit whatever space we have available in a few months when we buy a new home.  A different fate awaited the two corners which I'd worked so hard on with C.  Unsure yet how to pack them, Hubby popped them into the newly emptied attic for the time being.  I went in there to fetch out Bug's guitar and found carnage.
Some small mouse-shaped rodents had taken a shine to the papier-mache it seems, and this is all that remained of our hard work:
I managed to rescue a couple of people, my picnic bench and bridge and a couple of sheep, but that's about it.  To be honest I'm quite impressed with how chilled out I am at seeing hours of work destroyed.  It means we'll start afresh with our new layout, and we've learned a few things on the way.  Next time I'll use modroc or plaster to build the scenery for a start, I imagine it's slightly less palatable than the flour/water paste I used for the papier-mache.  I'm intrigued where the rest of the people, the Fimo food and the sheep are gone.  I'm imagining a Borrower or Beatrix Potter-esque scenario with lots of miniature sheep decorating a mouse-hole somewhere.

Wednesday, 4 June 2014

Model railway progress - rocky skerry for lighthouse

While in Gairloch last September C found a small lighthouse and boat, which he decided should belong with his model railway, and he spent his holiday pennies on them with much excitement.  8 months later, and we finally have a proper place for them on the railway.

We used a cardboard base, which has bent a lot as the work has dried, so at some point we'll remake this with a plywood base cut to fit the whole harbour.

We started by scrunching up some newspaper balls and taping them to the base to make the shape of our island.  This was a joint C, Bug and Mummy effort.

Next we got a 50:50 mix of PVA and water, and lots of torn up kitchen towel, and stuck down the kitchen towel, brushing them with the mix as we went, and pressing them into the corners.  It's important to ensure that the whole surface is covered with overlapping squares.  Bug particularly enjoyed this job.


Bug, admiring her work
Leave it to dry in a sunny spot for a few days.

After that we painted.  We used poster paints.  Green and black for the rocky island, and a glittery blue for the water.  Both children did this.

To finish off I attached the lighthouse to the top with PVA.  Then I brushed a PVA water mix over the blue paint, and laid on some clingfilm, which was a bit scrunched near the island (where the waves would be).  I also brushed PVA/water mix over the green paint, and sprinkled on some model railway scenic grass.


Monday, 28 April 2014

Progress on the model railway: a picnic, a rocky skerry and a new layout

this picture from a few weeks ago shows the additional board that Hubby had laid out to double the size of the railway - it's now going to require its own room when we're house-hunting!
this picture shows how it looks now.  Hubby used blackboard paint so that we could sketch our track layout on with chalk and have a base to work up from.

This will be a harbour, with its own station (think Mallaig or Kyle of Lochalsh), a low wharf, and a rocky skerry with a lighthouse.

This is the main station, with the village in the middle of the track.


so a little while ago I posted this picture of my picnic bench and little picnic basket
I got busy with the Fimo this weekend (for the first time since I was a teenager).  I found the scale pretty tricky, but have made some form of picnic at least.  C thinks it's hilarious and keeps telling me that my banana and "peas" (they are apples!) are very big for the people.

I also got a little distracted while playing with the Fimo, and made this owl, which has a loop in the top so that I can make it into a keyring or necklace.

this is the beginning of our rocky skerry.  We built up the shape with screwed up newspaper.

then pasted the whole thing with a PVA/water mix, and kitchen towel squares.  Bug was very involved with this process.
It's currently in the process of being painted, so I'll post again once it's in situ on the railway.


Sunday, 9 March 2014

Picnic on the model railway

Today I've been doing some more work on the model railway.  My landscape corner has been waiting for some attention for some time:
My waterfall.  I did some experimenting to get the white water effect.  Underneath the stream is just painted blue.  I stuck cling-film to it with PVA and then blew it with a hairdryer to shrink it.  The trees are ready-made ones.  
This is C's corner.  Now that the fence is finally completed we can add some sheep without worrying that they'll cause problems on the train line.
Grandad made this engine shed for C for Christmas.  He even used real coal for the coal hopper.
Daddy has doubled the size of the layout, but hasn't yet got as far as extending the track.  I'll have to get a move on with scenery, buildings etc. to keep up with the expanding layout!
This bit has been added today.  I made the picnic bench by cutting small pieces of cereal box card.  I then stuck two of these together to add depth and strength and painted them with acrylic paint.  Finally I stuck them in place with PVA.  The people aren't very detailed, but I bought them as a job lot on e-bay, and some of them are in a seated position, so ideal to add to the bench.  I also added a man on the edge of the river, admiring the waterfall.  The picnic bench is a scrap of fabric which I cut with pinking shears.  Now I just need to add some picnic!  You can see to the side a bit of real life twig and lichen.  I'm not sure what it's supposed to be, but I'm conscious that I don't really have enough plants or shrubs yet.
This is my footbridge, which I'm quite pleased with.  It's made in a similar fashion to the picnic bench described above, using several layers of cardboard box card stuck with PVA, painted and then very gently PVA'd into place.  I've also stuck on a man looking out at the river below.  I've just got to hope that C and Bug remember my admonition not to try to move or play with the characters on the scenery, as they are now stuck in place!

Tuesday, 15 October 2013

Progress on the model railway - the fence

So for those of you interested in models and model railways etc. I have posted on progress on the model here and here.

I finally finished the fence which has been causing me a problem for some time now.

I spent an hour several weeks ago:


  • carefully chopping the heads off matches, 
  • cutting the matches in half
  • painting the matches with brown watercolour paint


Now it was time to work out how to make the fence wire.  First I glued the fence posts on to the scenery.  This was quite successful.  Then I tried to glue the wire (plastic thread for bead work) on to the posts.  This wasn't successful.  In order to hold it in place to allow it to dry I pegged the wire in place on each post.  The washing pegs were too heavy, so pulled many of the fence posts over.  In addition, when I pulled off the pegs it turned out that the wire was more stuck to the pegs than it was to the fence posts, so the whole thing fell to bits.

This time I've done it mostly the other way around.  I pulled the wires tight between some books, and carefully placed glue covered fence posts into place.  When this was dry this was the main portion of fence done.  Now I had a problem though, this fence section was too short for the area it needed to surround, but now there wasn't enough wire at the end for me to hold in place taut.  I stuck the fence on to the scenery, then I stuck further fence posts in place at both ends.  I haven't actually finished the fence in the strictest sense, because I'm still carefully gluing the wires on to these extra posts, wrapping around both sides of fence posts (instead of neatly on the inside) but just trying to get the wires fixed to the posts.

I've now ordered some sheep for C.  Up until now we haven't been able to order any sheep because without a fence in place they'd be wandering all over the train track, but now that the fence is there, we feel confident to put some sheep on the scenery.  Another picture with sheep in situ to follow in a couple of weeks.  I've also made a pretty good start on the Village School from Metcalfe Models.

Tuesday, 27 August 2013

How's the model railway progressing? Trees

Slowly slowly...
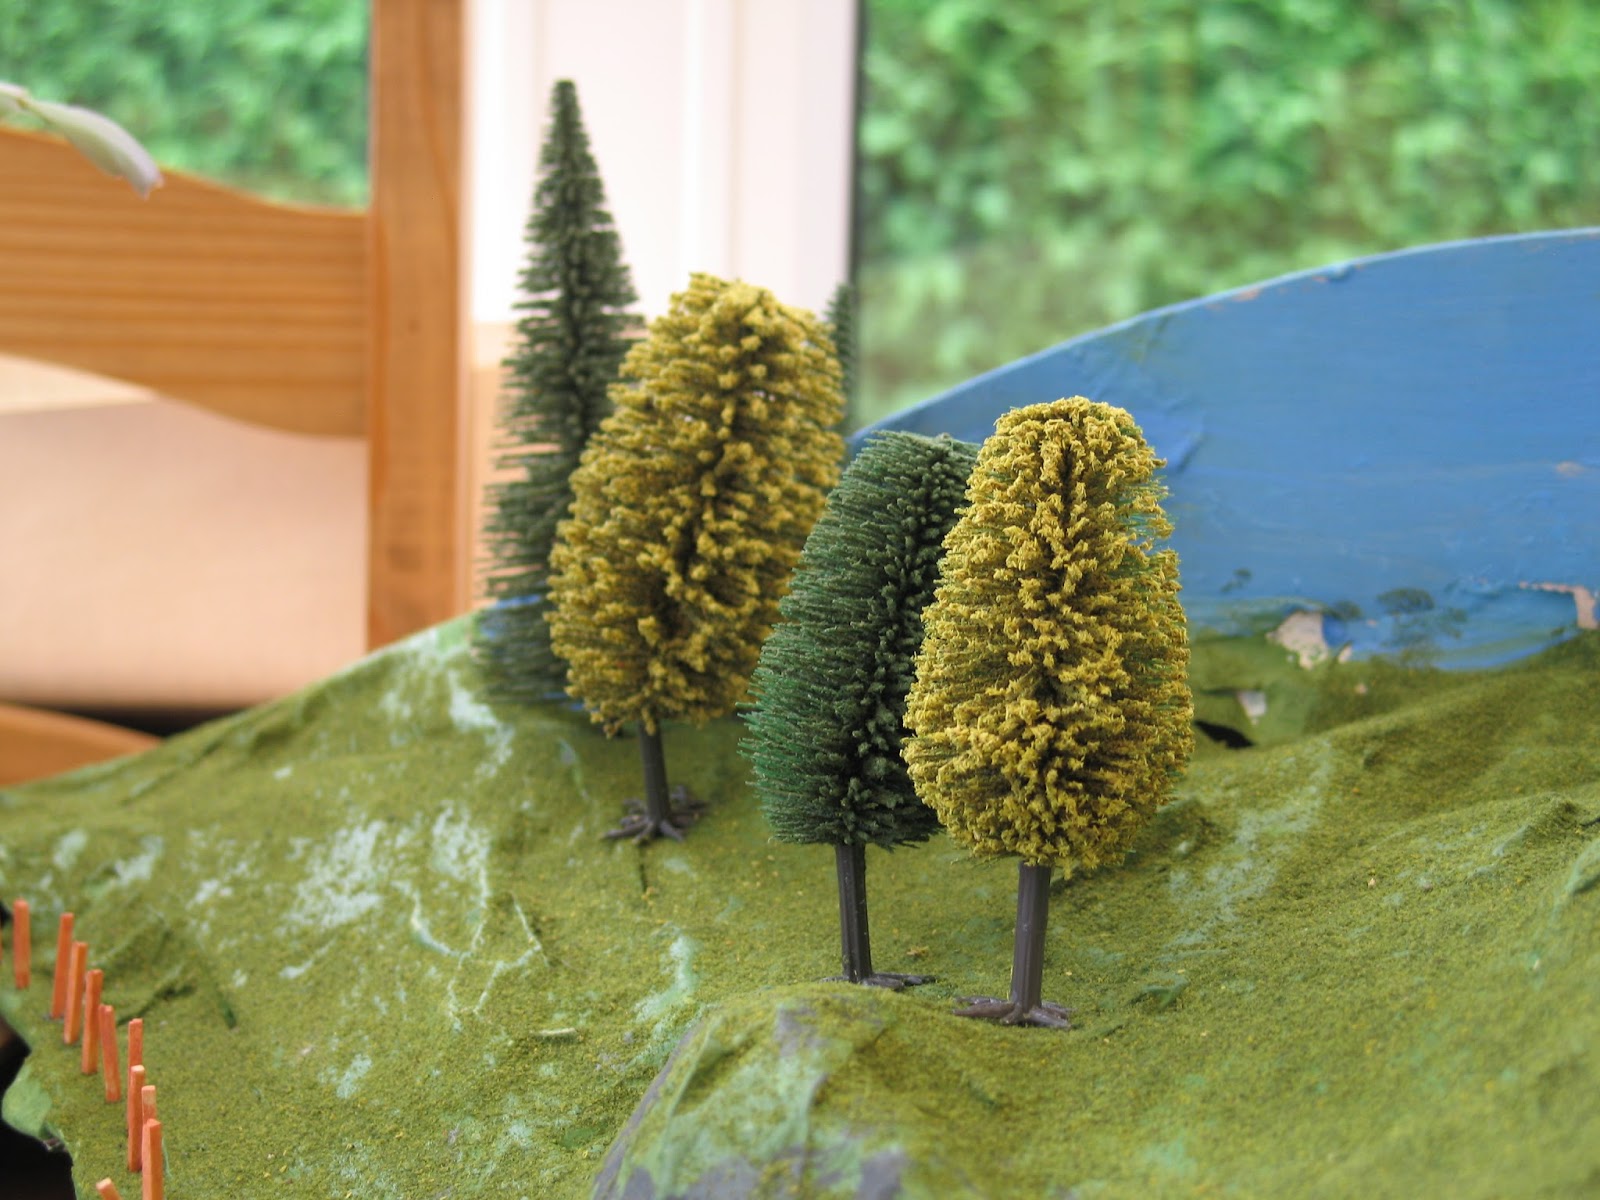
We've now added some trees to our scenery.  These are Noch mixed trees.  I've just glued them on with PVA, but as the scenery is sloped, and neither the "roots" nor the bottom part of the trunk bends, they are bent at the top instead.  They've made quite a difference to the look of the scenery.
As you can see from the bottom corner of the photograph, I've also started work on the fence.  It's quite intricate so I'm taking my time, and at the moment I have about 25 washing pegs attached to it to hold the wire in place while the glue dries - not that clever as it turns out, as the washing pegs are now glued to my very delicately held in place fence!

To add to the fun, Hubby has decided to completely change the layout of the track, and double the size of the model.  The pieces of scenery I've already got started on won't be affected.  I made them mobile, as he gave hints that this layout wasn't the final one right at the beginning - but it does mean I'll have to get a shift on to fill in all the scenery on such a large model.  I'm trying to complete one thing every week...  but at the same time, I've still got two small children, do a lot of Scouting, have a house and garden to look after and am trying to earn some money working from home (and keep being reminded not to try to do too much!).

Wednesday, 10 July 2013

Progress on the Model Railway

Progress with the model railway is slow.  
This is a good thing.
It's teaching me to be patient.  It's also teaching C to be patient.  
We're working on it a tiny bit at a time, but it will look awesome.
The most recent updates are that we are very close to completing the "Manor Farm House" and "Farmworkers Cottage", both cardboard cut outs that need glueing together, from Metcalfe Models.  This week we made and added the chimney pots, and then it's just the roof ridge tiles.  The buildings are currently pristine and just like all the other Metcalfe Manor Farm Houses.  When we get on to modelling the landscape in the middle of the track, we're going to make them look a bit more realistic, adding a name sign, some drainpipes, some flaking paint or ivy, some dustbins and a garden - but that's all a long way down the line.
The other thing we've just got done last week is finally added scatter material on to our landscape.  I bought some from the Model Railway shop at the North York Moors Railway Depot in Grosmont.  I was disappointed ten minutes later when I found a wider variety at a lower cost in another model railway shop across the road!  The next job we've to do on the scenery is to make some fencing.  C can't put any sheep on his meadow until we've got some fencing to prevent them wandering across the railway!

Wednesday, 17 April 2013

Model railway progress

Grandad is coming to visit this weekend.  I'm looking forward to them coming, but am worrying what he'll think of our model railway.  His is enormous - it goes around his entire attic and has an incredible bridge, and lots of engines, two stations and....and...
I guess I should also remember that he's been working on model railways for more than fifty years, and we've had ours only four months, and that my companion in modelling is not yet four.  Still, here's where we've got to with our scenery:

Still very much a work in progress - papier mache and then paint is done, now we need to add some scatter materials to get the grassy look, I need to make my water more realistic, we need some fencing and some trees, I'm going to make a picnic bench and a bridge, we've got some people on the way, and C needs some sheep.  But they are far enough along that I've put them next to the railway, and C can see what they are for now.  Don't they look great with Thomas passing by?  (The playmobil people in the trucks are Bug's additions, she just can't resist!)

Tuesday, 9 April 2013

Madly modelling

No, I'm not going down the route of becoming a model, that would be hilarious.  

For Christmas C. got a model railway from Santa.  Hubby made a table for it and got it all set up, Grandad gave a couple more engines and trucks, a colleague of Hubby gave some more truck and another engine and carriages and C adores it.  He shunts trucks and hauls coaches and will happily play with it all afternoon.  Rewards for getting 20 stars on the chart have included some people, a signal and a level crossing... so now all we need is some model to go with the railway.

This is where I confess that I got quite excited by the old copies of "Railway Modeller" magazine that Grandad passes on to C.  I love making things, and the idea of making scenery thrilled me.  Who cares about the railway!  What I want to make are market stalls, hillsides, gates, trees, waterfalls and the like.  So the scenery is my department.

To start with I thought that we'd do two corners to fit outside the oval track.  Who knows how long the layout will stay as it is, or how well we manage at our first attempt, so I decided to make them on their own bases, so that they will sit on the railway baseboard, but we can model them well away from the railway, take our time, add to them and so on, and then if we decide a year down the line that we can do a better job, we'll be able to remove them and start again.

I bought some thin plywood and squarish sticks (I don't think that's a technical term) and carefully measured and drew on my plans.  Then I needed Hubby to supervise me using his Jigsaw - apparently I'm too much of a liability to trust with a dangerous power-tool by myself.  Once I'd cut all the pieces came the job of gluing them together.  

Then it was time for C to get involved.  At the moment I don't think he really gets the modelling potential of his railway, so this is the bit that needs to inspire him.  He has a corner, and I have a corner.  I tried to explain to him that scenery is lumpy and bumpy, not flat like plywood, and then we got going with papier mache to create some rolling hills.  I know exactly what I want my corner to look like, but I think C's image is still evolving - it definitely is going to involve sheep, and may now include a fox, but he also mentioned a swimming pool in the process of doing the papier mache!

Here's what they look like at the moment:  


From this point on, I'll do my bit first, to try out the process, and then I'll be able to guide C and work with him on his the next day, when he'll be able to see from mine what it should look like.  Watch this space to see how we get on.