Banner

Showing posts with label tutorial. Show all posts

Monday, 5 April 2021

A wildlife friendly garden - making a pond

 You might think that making a wildlife pond in your garden is a major undertaking, both in terms of financial outlay and time and energy taken.

I can assure you that it doesn't have to be a big job.

This pond went from a delivery in a cardboard box to complete in under an hour and a half, and the whole thing cost around £40.

First, the pond liner from Amazon:

I also got some oxygenating pond plants:

1. Decide on your spot.  You want somewhere that gets some sunlight, but not all-day direct sunlight otherwise it will get pretty warm and evaporate quite quickly, as well as going green.  Of course, you can dig a hole and sink your pond into the ground if you want.  I've done this in the front garden with exactly the same type of liner.  However, you don't HAVE to do this, and it's absolutely possible to put a simple pond on a patio.  Mine is in a gravelled corner next to a wall and near an olive tree.

2. Build up some support underneath.  I was considering buying some 2x4 timber and building a support for my pond, but decided that with the curvy edges that didn't fit with the "easy project" I was looking for.  However, you need to bear in mind that water is heavy, so you will need something underneath your liner to give it some support around the edges.  I put some bricks underneath the shelved areas and built up with some rubble that we've had stacked against the wall for a couple of years.   

You may wonder what the yellow hose in this picture is... it's the overflow from our water-butt. It's gravity fed over to this corner to keep it away from the timber of the garage. I've just bent it around and left it some space.  To be honest, the water butt doesn't have much in it at the moment, as I've now put most of the water into the pond!
3. Next, put some pot plants around your pond.  This not only disguises the black plastic of the pond liner and the mess of the rubble, but it also gives a stepped access for your wildlife to get to the pond.

4. Naturalise a bit.  As you can see, we've not only planted up some of those pots with a range of plants and planted some bulbs and seeds, but we've also added some branches from the holly tree I severely pruned last year to create a wildlife ramp and to disguise that black plastic a bit more.

5. Put some wildlife shelter inside the pond.  If you want bugs and amphibians to take up residence in your pond, you need to give them some appealing real-estate.  They aren't going to be taken with an expanse of shelter-less black plastic.  In my pond I installed a terracotta plant pot, a couple of broken pieces of slate, some gravel and some pebbles of various sizes.  This gives lots of nooks and crannies to allow the wildlife to get in and out and to provide them with some cosy places to live.


6. I'm pretty pleased with how this is looking.  Time to start adding some water.  Here's some oxygenating plants to put in too.  At some point I'm going to add some more pond plants - I'm looking at flag irises as they are very attractive to things like dragonflies - the adult clings on to the plant as she deposits her eggs in the water, and the larva will later climb up the iris to emerge as an adult.
It's important to use rainwater rather than tap water, as tap water has chemicals added in to make it clean for us to drink, but not so welcoming for the wildlife! I filled several watering cans from my water butt.

And here is the finished pond looking very happy in its corner.  With wildflower seeds sown in the planters, and plenty of nooks and crannies for wildlife both in, under and around the pond, I can't wait for the wildlife to move in!  I've already seen a blackbird and a pigeon having a good drink (and a Cocker Spaniel, but she doesn't count), and a blackbird helping herself to the wildflower seeds I'd planted.


Please note - this post does contain some affiliate links.  That means that if you follow my links to buy the products on Amazon, I get a small commission.  It doesn't affect the price you pay at all.

Tuesday, 19 May 2015

Tuesday Tutorial - How to make a campfire cushion

 Some of you  may remember my post a few weeks ago about the tepee I made for the children to play in the garden.  I also made a campfire cushion and some bunting to go with it.  From Bug's point of view, the tepee is certainly the most successful item, and she also loves the bunting, and has plans for me to make a lot more of it.  For me though, I was most pleased with the cushion.  I've now made several more of these campfire cushions, am sending one to a friend from Scouting (I sent me something awesome several months ago, so if he reads this he'll now know who he is), and have some for sale on my Folksy shop, with a posting coming soon on Etsy.  So here's how to make one:

You will need: 
  • canvas or other fairly hardwearing light coloured fabric.  I used lightweight canvas because I had plenty left over from the tepee construction.
  • a square each of red, orange, yellow and brown felt
  • fusible interfacing (bondaweb or similar)
  • red thread and natural thread
  • polyester toy stuffing - large bag
  • cutting tool (I use a rotary cutter and mat), scissors, sewing machine, needle

 - First measure and cut your first triangle.  Each side is 40cm (about 16 inches).
 - Cut around this triangle to cut three more.

 You can either cut your felt into flames and log shapes first and then fix them to the fusible interfacing (as I've done in this picture) or you can fuse the interfacing onto the whole sheet of felt and then cut out the shapes (which I did when I was making eight cushions at once).  Either way, you get your flame and log shapes with the fusible interfacing on the back.
 Peel the backing paper off the interfacing and arrange the flames and logs how you'd like them to make your fire, then iron them through a damp cloth to stick them.
 Use the sewing machine and red thread to stitch over the edges of all your felt pieces.  This not only stops them from peeling off in the future, but also adds some definition to the fire.
 Next, pin the triangles together right sides together (making sure to keep all the fires the same way up) to make a pyramid and stitch with cream or natural coloured thread, leaving a small gap on one of the bottom edges to turn the right way out.
 Turn the pyramid the right way out, stuff and then overstitch to close the gap.  
Et voila!  A cosy campfire cushion to inspire creative play and just to look gorgeous around the home or garden.

Wednesday, 2 April 2014

Tutorial - easiest ever skirt

Easiest ever elasticated summer skirt.
Probably the trickiest part of sewing this skirt is measuring and cutting out the fabric.  You are going to cut 8 identical panels.  Unless your fabric has a right way up, you'll need 1m for an above the knee skirt (length about 45cm).  Obviously a longer skirt will require more fabric.  Start with the following: Measurement A - measure around the widest part of your hips and bottom.  Add about 10-12cm (this allows for 1/2 cm seams and a little bit of leeway).  Divide by 8.  This is the measurement of the top of one panel.  Measurement B - take the width of your fabric, subtract 2 x A, subtract about 15cm and divide by 2.  This is the measurement of the bottom of the panel.


You'll probably want to draw a diagram with your measurements to make sure that it all fits.  The fabric is folded in half, and you end up with four panels on each half.  Once you have measurements A and B, you can draw a template for the panel if you like, or you can draw the whole thing on to the fabric and just cut it out.

You will end up with eight pieces of fabric this shape.
Pin them together.  
Then sew all eight seams.  I used a normal running stitch on the machine, and then did the seams again with a tricot stitch in the hope that this will prevent fraying.


Press the skirt.  While at the ironing board, fold and fold again and press to create the channel for the elastic at the top, then do another double fold and press for the bottom hem.  I then added a daisy embellishment to the bottom hem, pinned the hem in place and stitched through the daisy embellishment, and again around the top of the hem fold-over.  Next, sew around your waistband, ensuring that you've left a gap to feed the elastic.

Cut some elastic long enough to comfortably go around your waist without stretching.  Pin one end of the elastic to the skirt with a safety pin, and then attach a safety pin to the other end of the elastic and use the safety pin to guide it through the channel in the waist band.  When you've got it all the way through, tie both ends together loosely.  At this point, try the skirt on.  Adjust the knot in the elastic until the skirt fits comfortably around your waist.  Now stitch the gap you left in the waist band channel closed, and press your skirt.  You've done it!

Here's the finished item.


A lovely summery skirt (and new sandals).  Now all I need is some summer weather and a bit of sun on my legs!


Saturday, 28 December 2013

Quilted place setting place-mats - TUTORIAL

Quilted place setting placemats – tutorial

First decide on the layout of your place settings.  I used an A3 sized piece of paper and laid out a plate, cup and cutlery and then drew around them.  Do this in mirror image as well.

Choose your fabric.  Use a plain fabric for the place setting side, but you can use any pattern on the other side.  You’ll need your A3 size of each, plus some wadding.  I made six, so needed 6 times this much.  Measure the perimeter as well, as you’ll need to buy bias binding.  You’ll also want some co-ordinating thread for the quilting, and some contrast thread for your place setting.  Cut out the fabrics to the right size.

Baste your plain fabric to your wadding to hold it in place.  Draw over the design on your mirror image layout with chalk.  Then press it face down on the plain fabric so that you have a chalk image the correct way around.  Use back-stitch to hand sew your place-setting design.

Now baste the other piece of fabric on to the other side of the wadding.  Depending on your design you can hand or machine quilt this.  I used a machine to do simple diamond shapes.

Trim the edges of your fabrics and wadding so that they all line up.  Pin your bias binding in place and sew it on.

Trim all loose threads and pull all basting out.


Enjoy your very own personal quilted place setting place-mat!


Friday, 30 August 2013

Quilted patchwork wall hanging - tutorial

As regular readers will know, I am hoping one day soon to make some money by crafting.  In the meantime I am making as much as possible, building up experience, learning from mistakes, and learning what works, what might be viable as a craft to sell and what is just too time consuming.

My niece is four on Monday.  Her family has just moved into a new house, where for the first time she has her own bedroom and isn't sharing with her big brother.  I wanted to make her a birthday present for her bedroom, tied to the colour scheme, which is apparently pink with a hint of green.

I learnt plenty along the way with this project.  First, make sure that you have everything you need before you start - I bought the fabric for the patchwork, but not the backing or the bias binding, and my race into Perth on the way back from somewhere else yielded colours which are okay, but not exactly what I was looking for.  Then I got home and found I still didn't have any fusible webbing or pink thread for the bias binding - so I ended up managing without.  Which brings me to the second thing I learnt:  Leave yourself plenty of time.  I started this with under five days before it needed to go in the post.  With so many other things going on, it was a real struggle and I think the quality of finish shows it.

So here goes:
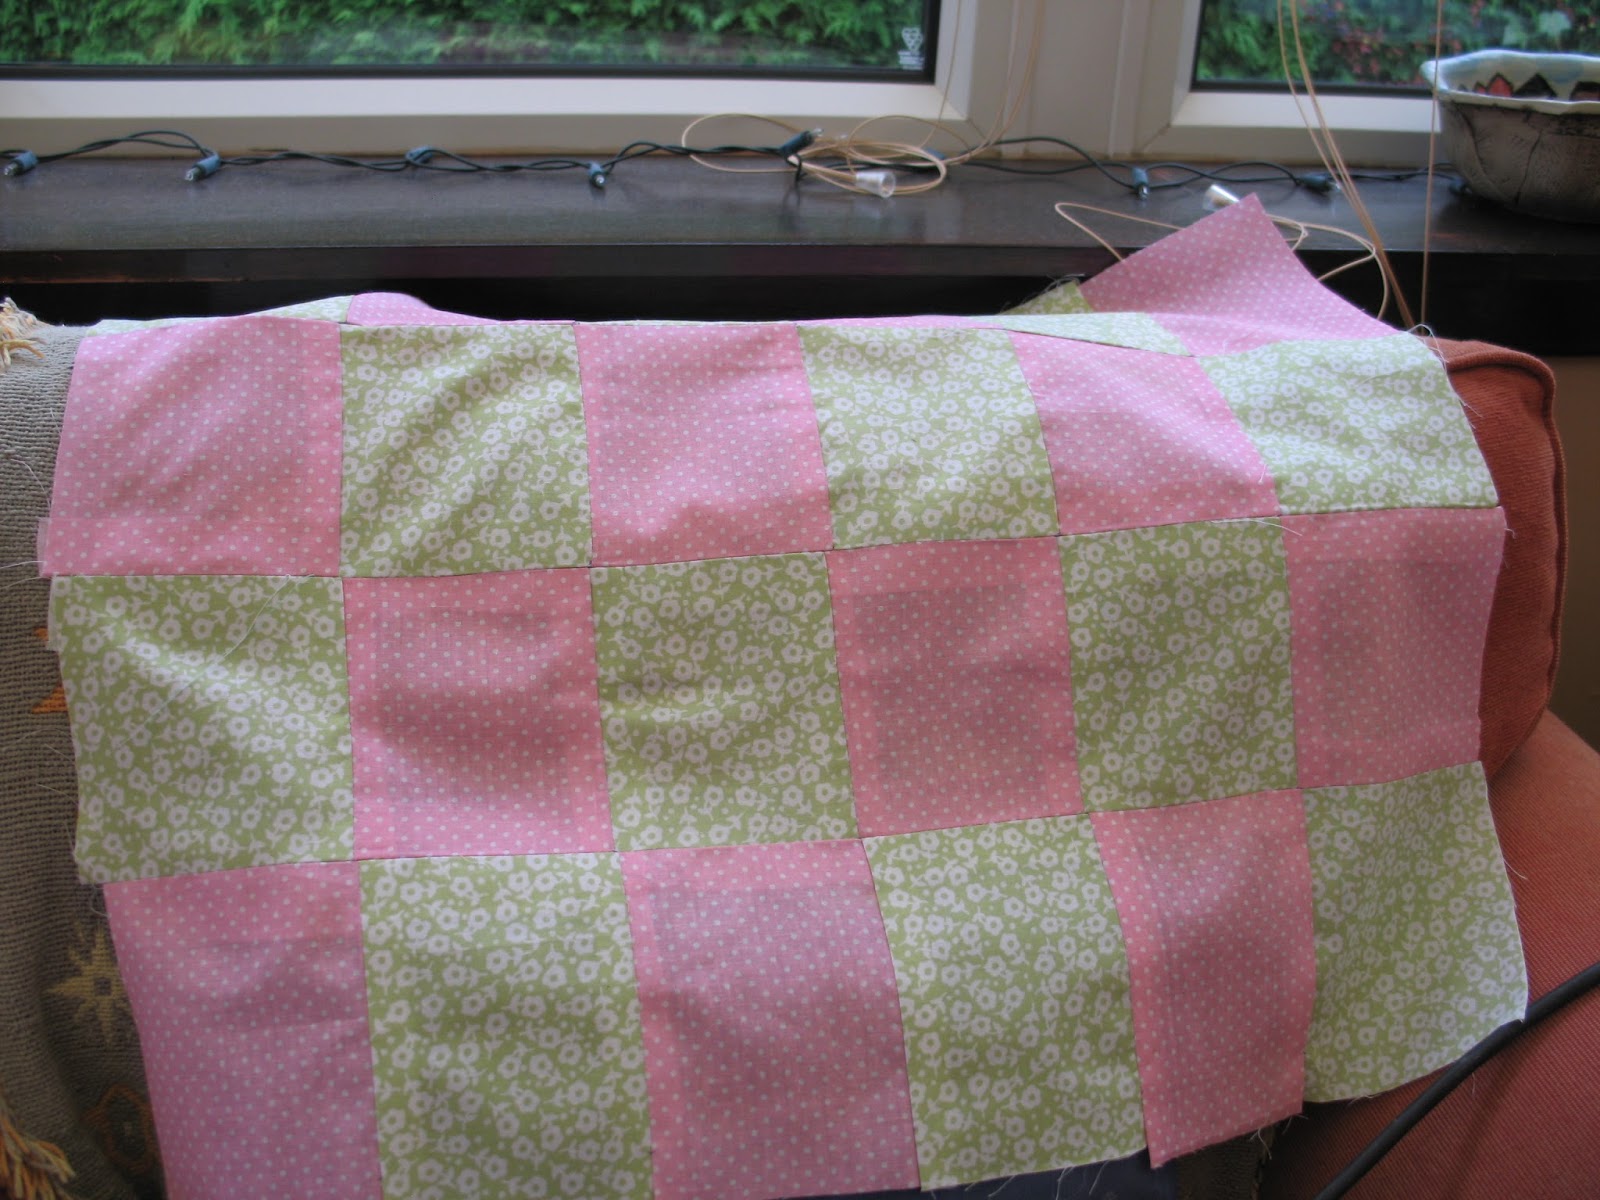
1)  Cut out the pieces of fabric for the patchwork, baste them together (I used a card template to ensure they remained 12x10cm) and then stitch.
2)  Iron the seams.
3) Cut out the letters for the name (using card templates), and fix on.  Ideally you would use fusible bonding web for this, but...
...I didn't have any, so carefully folded under the edges and hand stitched.
4)  Add the wadding and the backing, baste together and then quilt around the letters, leaving a large space.  I did this with the machine, but I hadn't basted very well, so the fabric ended up a bit bumpy.
here's a closer look
5) press, pin, and then stitch on the bias binding, making sure that you catch both pieces of fabric and the wadding within the binding.
6) stitch on a couple of hanging loops in matching ribbon.
7) Press the finished article, and then it's ready to hang on your wall, or in my case, to be wrapped up and rushed to the post office!